


上海雷瞬實業有限公司成立於二零一零年六月十三日,公司主營DIY電動自行車改裝套件、配套電動自行車電機及控制器等相關產品、高端自行車(路虎、寶馬)改裝、電動車配套(LiFePO4)磷酸鐵鋰電池(銀魚系列、小青蛙系列、水壺式系列、以及大功率定制磷酸鐵鋰電池)、汽車剪刀門及氙氣燈、碳纖維自行車整車、碳纖維輪組、配套花鼓、快拆、輻條、輻條帽、碳纖維輪圈等相關產品;公司產品90%出口到香港、臺灣、日本、新加坡、澳洲、俄羅斯、烏克蘭、歐洲、北美、南美、中東等。
上海雷瞬實業有限公司實力雄厚,重信用、守合同、保證產品質量,品種齊全、價格合理,以多品種經營特色和薄利多銷的原則,贏得瞭廣大客戶的信任。
汽車改裝業部擁有成熟的技術裝配團隊;一直以質量為基礎,誠信為根本,長期為國內外客戶提供優質產品:汽車遙控通用剪刀門、專款剪刀門、75氙氣燈等產品。
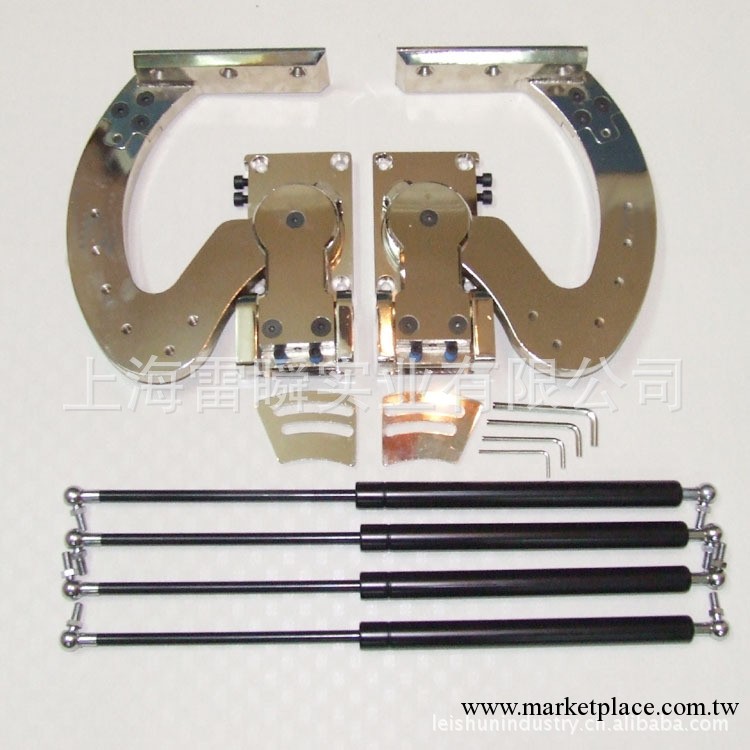
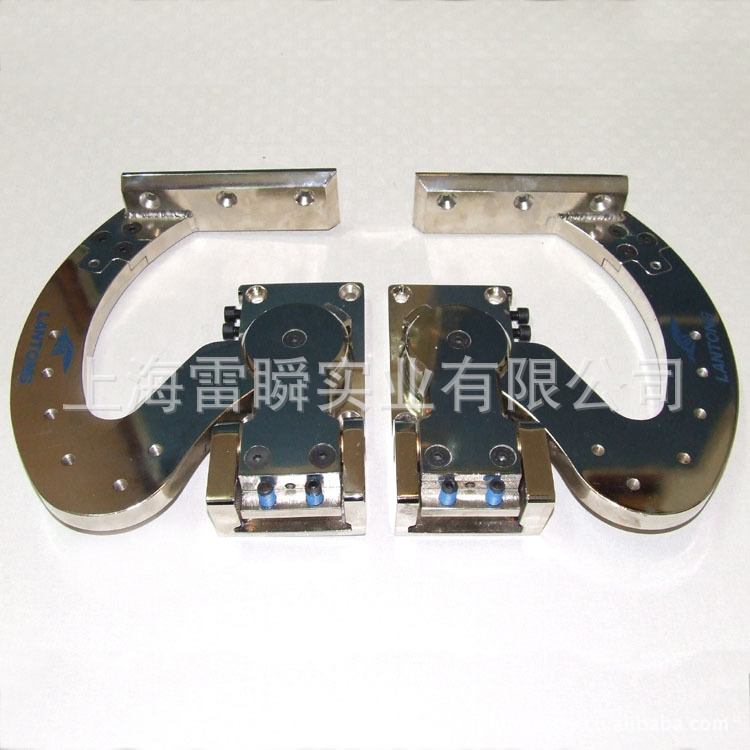
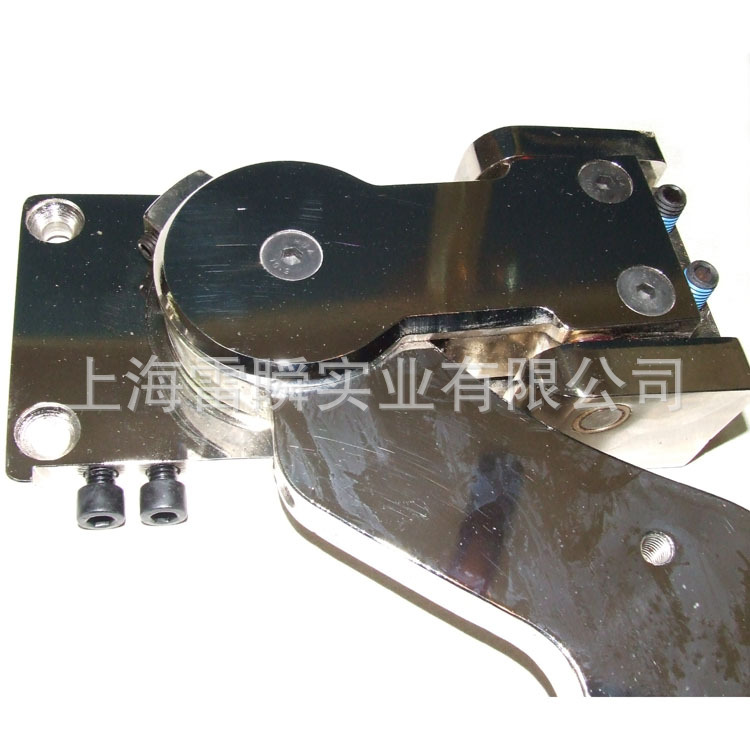
Newest Type Universal Lambo Door Kits:
Bolt-on type for most cars and trucks, no need welding (if the car steel plate is too thin then need welding.) Just need to drill for fixing bolts.
Advantages:
· Four heavy duty Gas Struts
· Truly 90 Degrees of Door Movement
· Adjustable Stop Points
· 100% CNC/CAM machined Nickel-plate steel construction
· CAD Designed
· Smooth Operation
· Maintains factory safety, accessories & function
· 2 Upright Door Hinges (Left and Right)
· They are universal and can be fitted to any vehicle
· Detailed Instructions
Features:
- Truly 90 Degrees of Door Movement
- CAD Designed
- Smooth Operation
- Adjustable Stop Points
- 100% CNC/CAM machined Nickel-plate steel construction
- Maintains factory safety, accessories & function
- 2 Upright Door Hinges (Left and Right)
- 4 Heavy duty Gas Struts
- They are universal and can be fitted to any vehicle
- Detailed Instructions
- Net weight: 20kgs
3. Installation:
WARNING: This is a universal kit, and may require custom modifications. We highly recommends professional installation by a custom fabrication shop.
Installation steps:
1. Disconnect battery.
2. Remove door panels and lower dash panels for easier access.
3. Remove fenders, and all necessary parts to remove them.
4. Remove door stop bar if applicable.
5. Remove all wiring running in to the door.
6. Close door and remove upper hinge.
7. Test fit Protocol Upright Door Hinge for correct placement on vehicle.
8. Be sure that the location the hinge will mount is flat, remove any unneccassary flanges or mounts.
NOTE: if cutting must be done be sure the chassis structure remains in fact.
9. Hold the hinge in place and tack weld it in position, on chassis and door.
10. Be sure all measurements are correct before welding, or you may need to cut the welds and start over.
11. Remove lower hinge.
12. Open door and test the swinging motion.
NOTE: use caution as there is nothing holding the door up.
13. Close door and replace fender to test the fit and motion.
14. Open door slowly, mark locations on fender that will need to be rolled or cut away, fender flange may need to be removed for more clearance.
15. Mark location on safety limit bar (on upright Door hinge) for correct outward movement.
16. Extend all wiring running into the door, to allow for vertical travel, (solder all connections to prevent electrical problems) open and raise to measure for wire length. Remove wires from the loom and cut. Cut on wire at a time to prevent mistakes. Solder the appropriate extension lead and tape/heatshrink. Repeat with all wires. A longer wire loom may be needed.
17. Make all the proper adjustments, to allow for smooth opening and closing operation. See Fine Tuning section below.
18. With door open, attach strut to the hinge, locate and mark mounting position for ball stud on chassis.
19. Attach ball stud to chassis using either the supplied mount or fabricate one for your specific application.
20. Re-attach fender and all parts, that were removed and test motion.


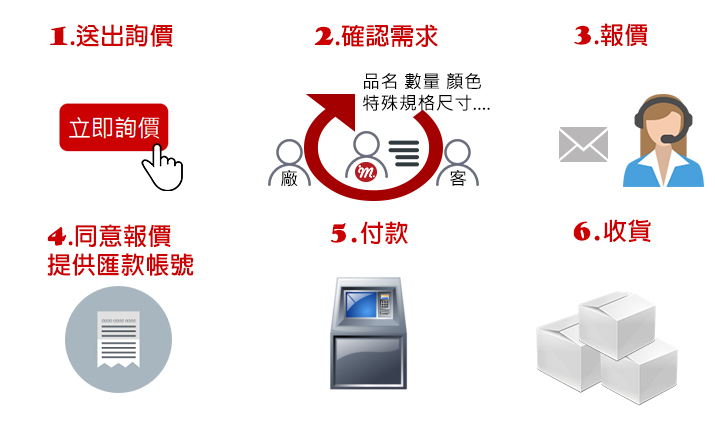
新手教學
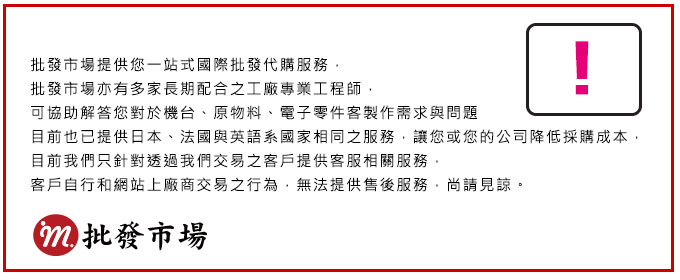
批發市場僅提供代購諮詢服務,商品內容為廠商自行維護,若有發現不實、不合適或不正確內容,再請告知我們,查實即會請廠商修改或立即下架,謝謝。